Events Overview
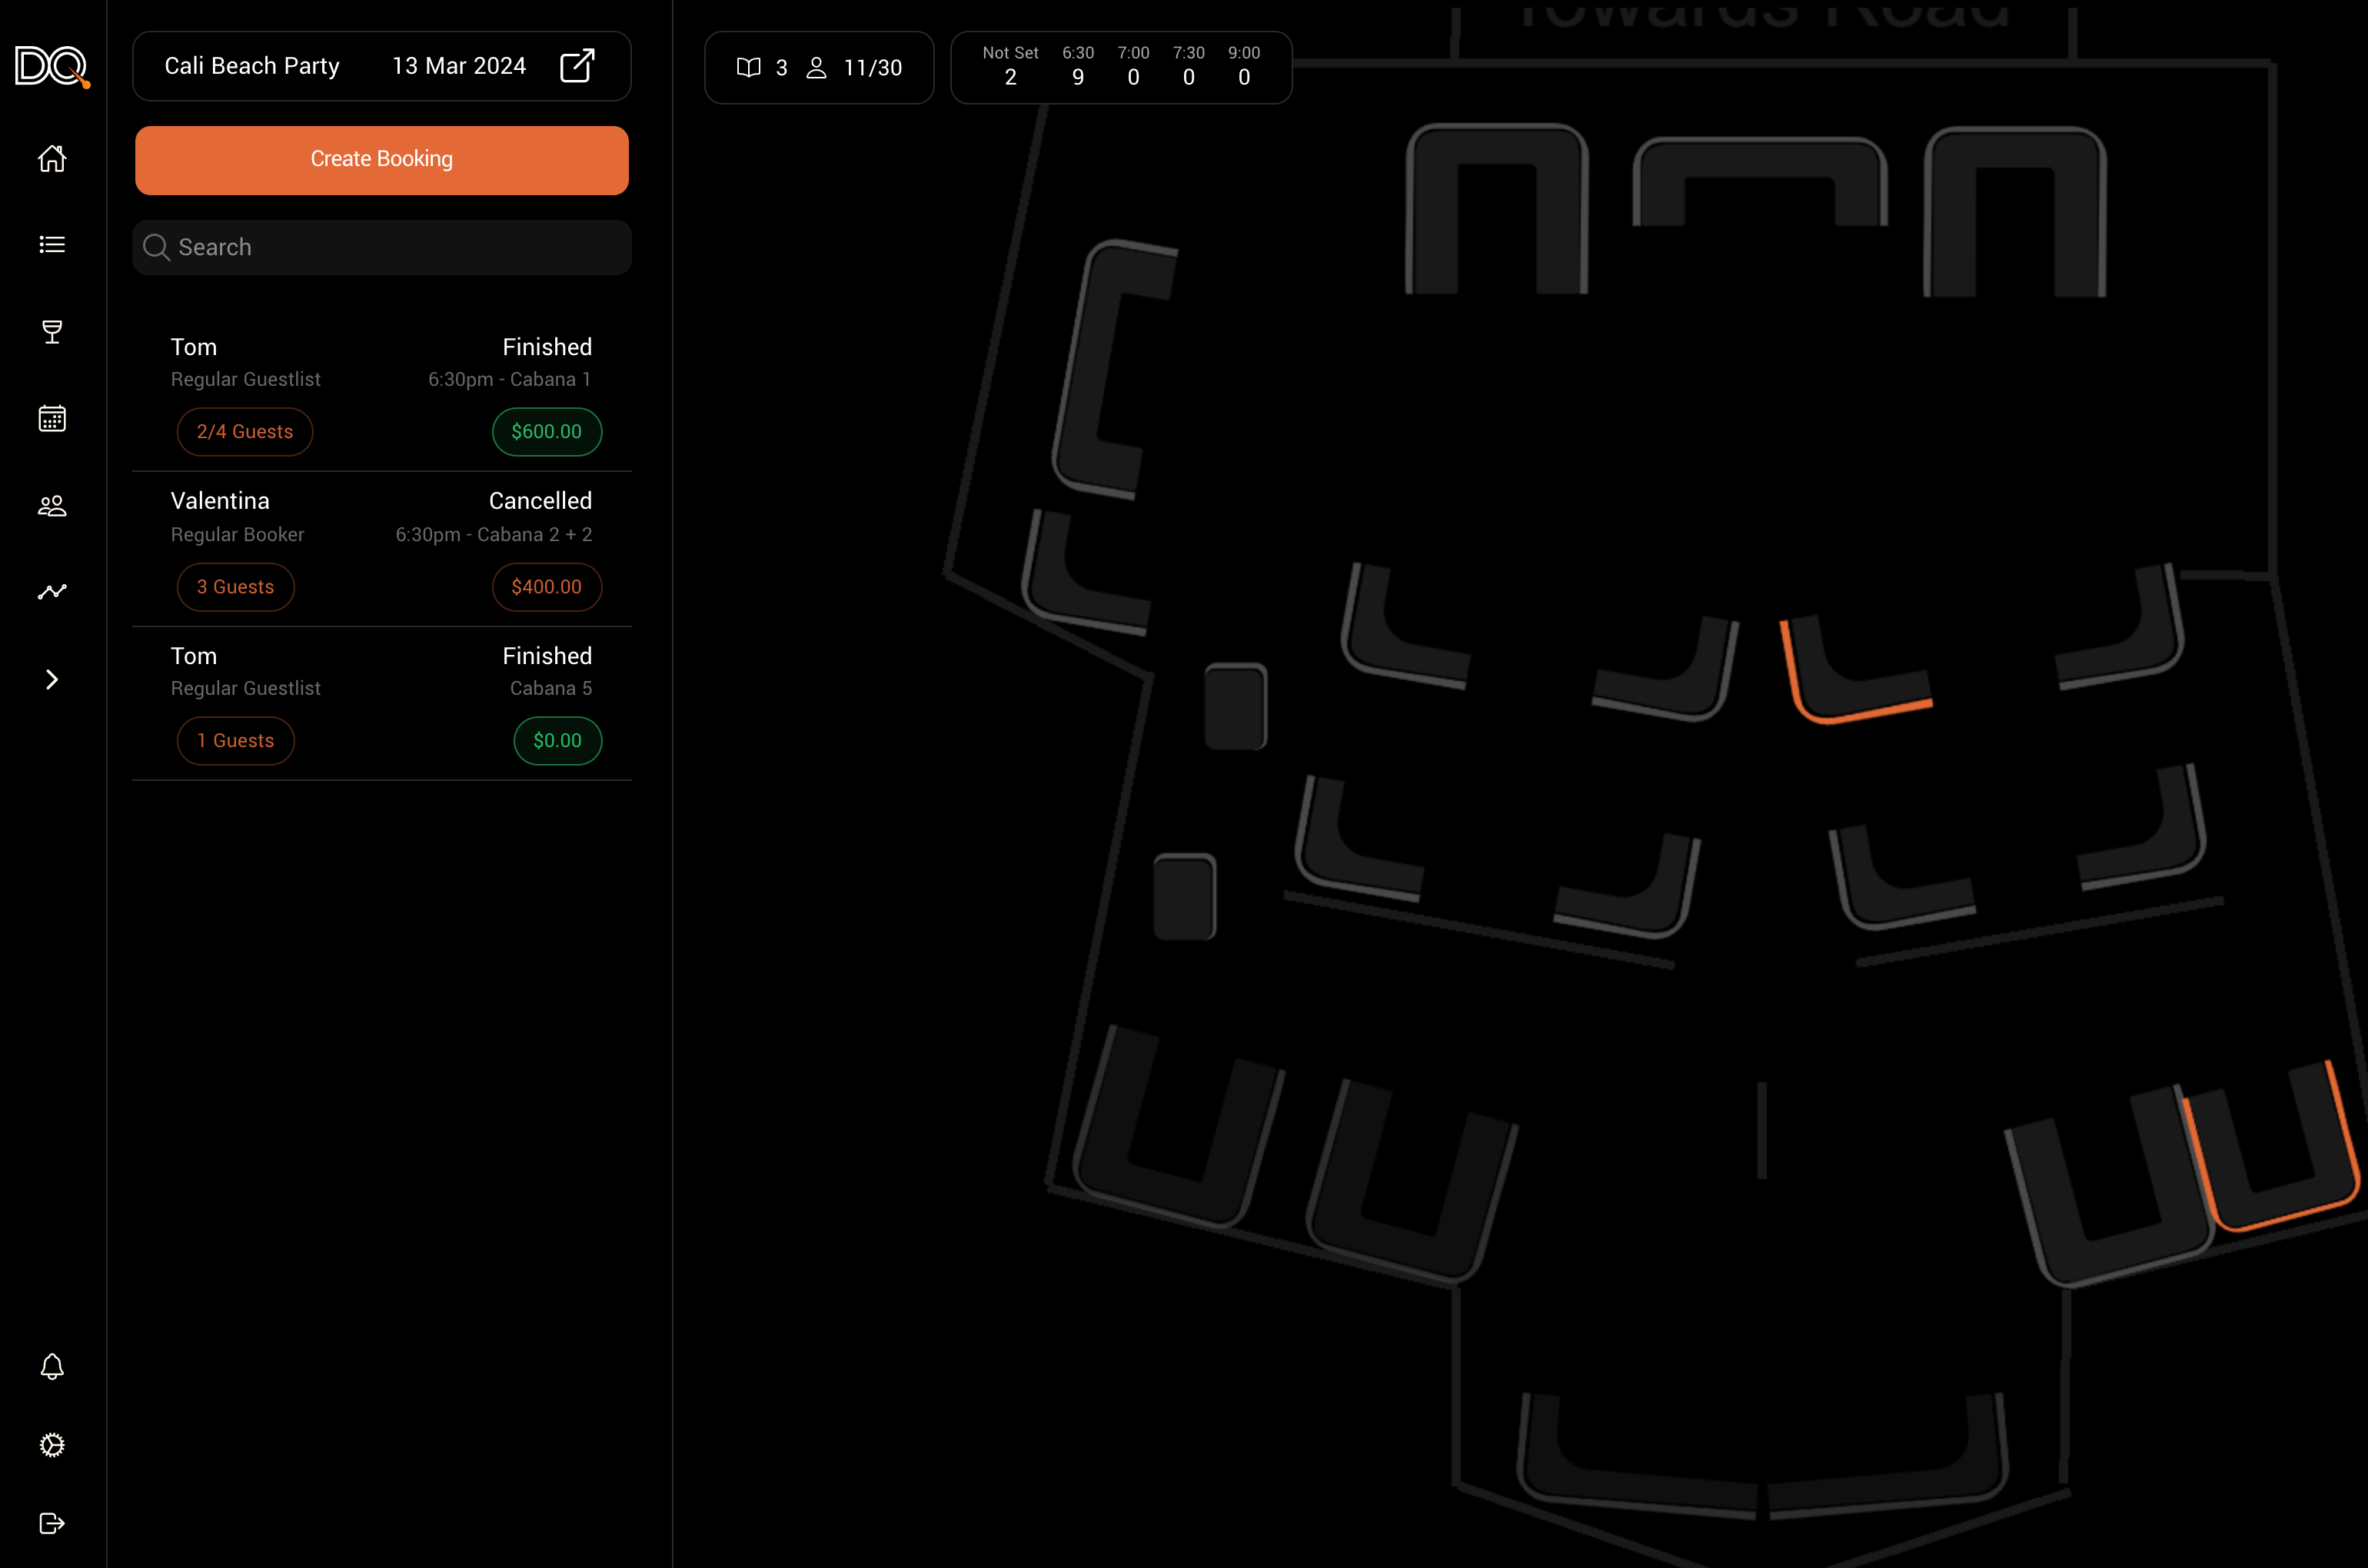
On the bookings management page, you’ll see your venue’s floor plan alongside a list of any pending bookings requiring attention.To view bookings for a specific event, select the event from the dropdown in the top-left corner. After selecting an event, you will:
- See bookings for that event.
- View a color-coded floor plan:
- Grey tables are vacant.
- Orange tables have a booking.
Creating Bookings
Using the Desktop Site
To create a new booking:- Navigate to the Bookings page by selecting the calendar icon from the left-hand menu.
- Click “Create New Booking.”
- Choose a Package — a templated booking option.
Using the DQ Pro App
In the DQ Pro app:- Go to the Bookings tab (bottom-right).
- Tap ”+” to create a booking.
- Select a Package or add Included Items.
| Property | Description | Required |
|---|---|---|
| Event | The event the booking is for | No |
| Booking Package | The template used for this booking | No |
| Guest | The primary booker | No |
| Table | The assigned table(s) | No |
If you have automatic communication enabled, an SMS or email will be sent to the guest with a link to view the booking and invite guests.
Managing Booking Information
Clicking on a booking opens a side panel with detailed information. You can:- Edit the guest or table by clicking their names.
- View and manage booking status, payments, and guest details.
There are three main tabs:
- Detail Tab
- Payment Tab
- Guest Tab
Displays booking payment info and included items.
You can:
You can:
- Change the package.
- (Depending on permissions) Edit the cost and inclusions.
- Use “Seat Guest” to check the guest in and request included items.
Other Booking Options
Seating Guests
Handling guest arrival and guest lists.
Night Setup
Starting the night using DQ.