Creating Events
To get started, go to /manage-events. To create a new event, tap the ”+” symbol (see annotation 1) at the top right of the events list panel.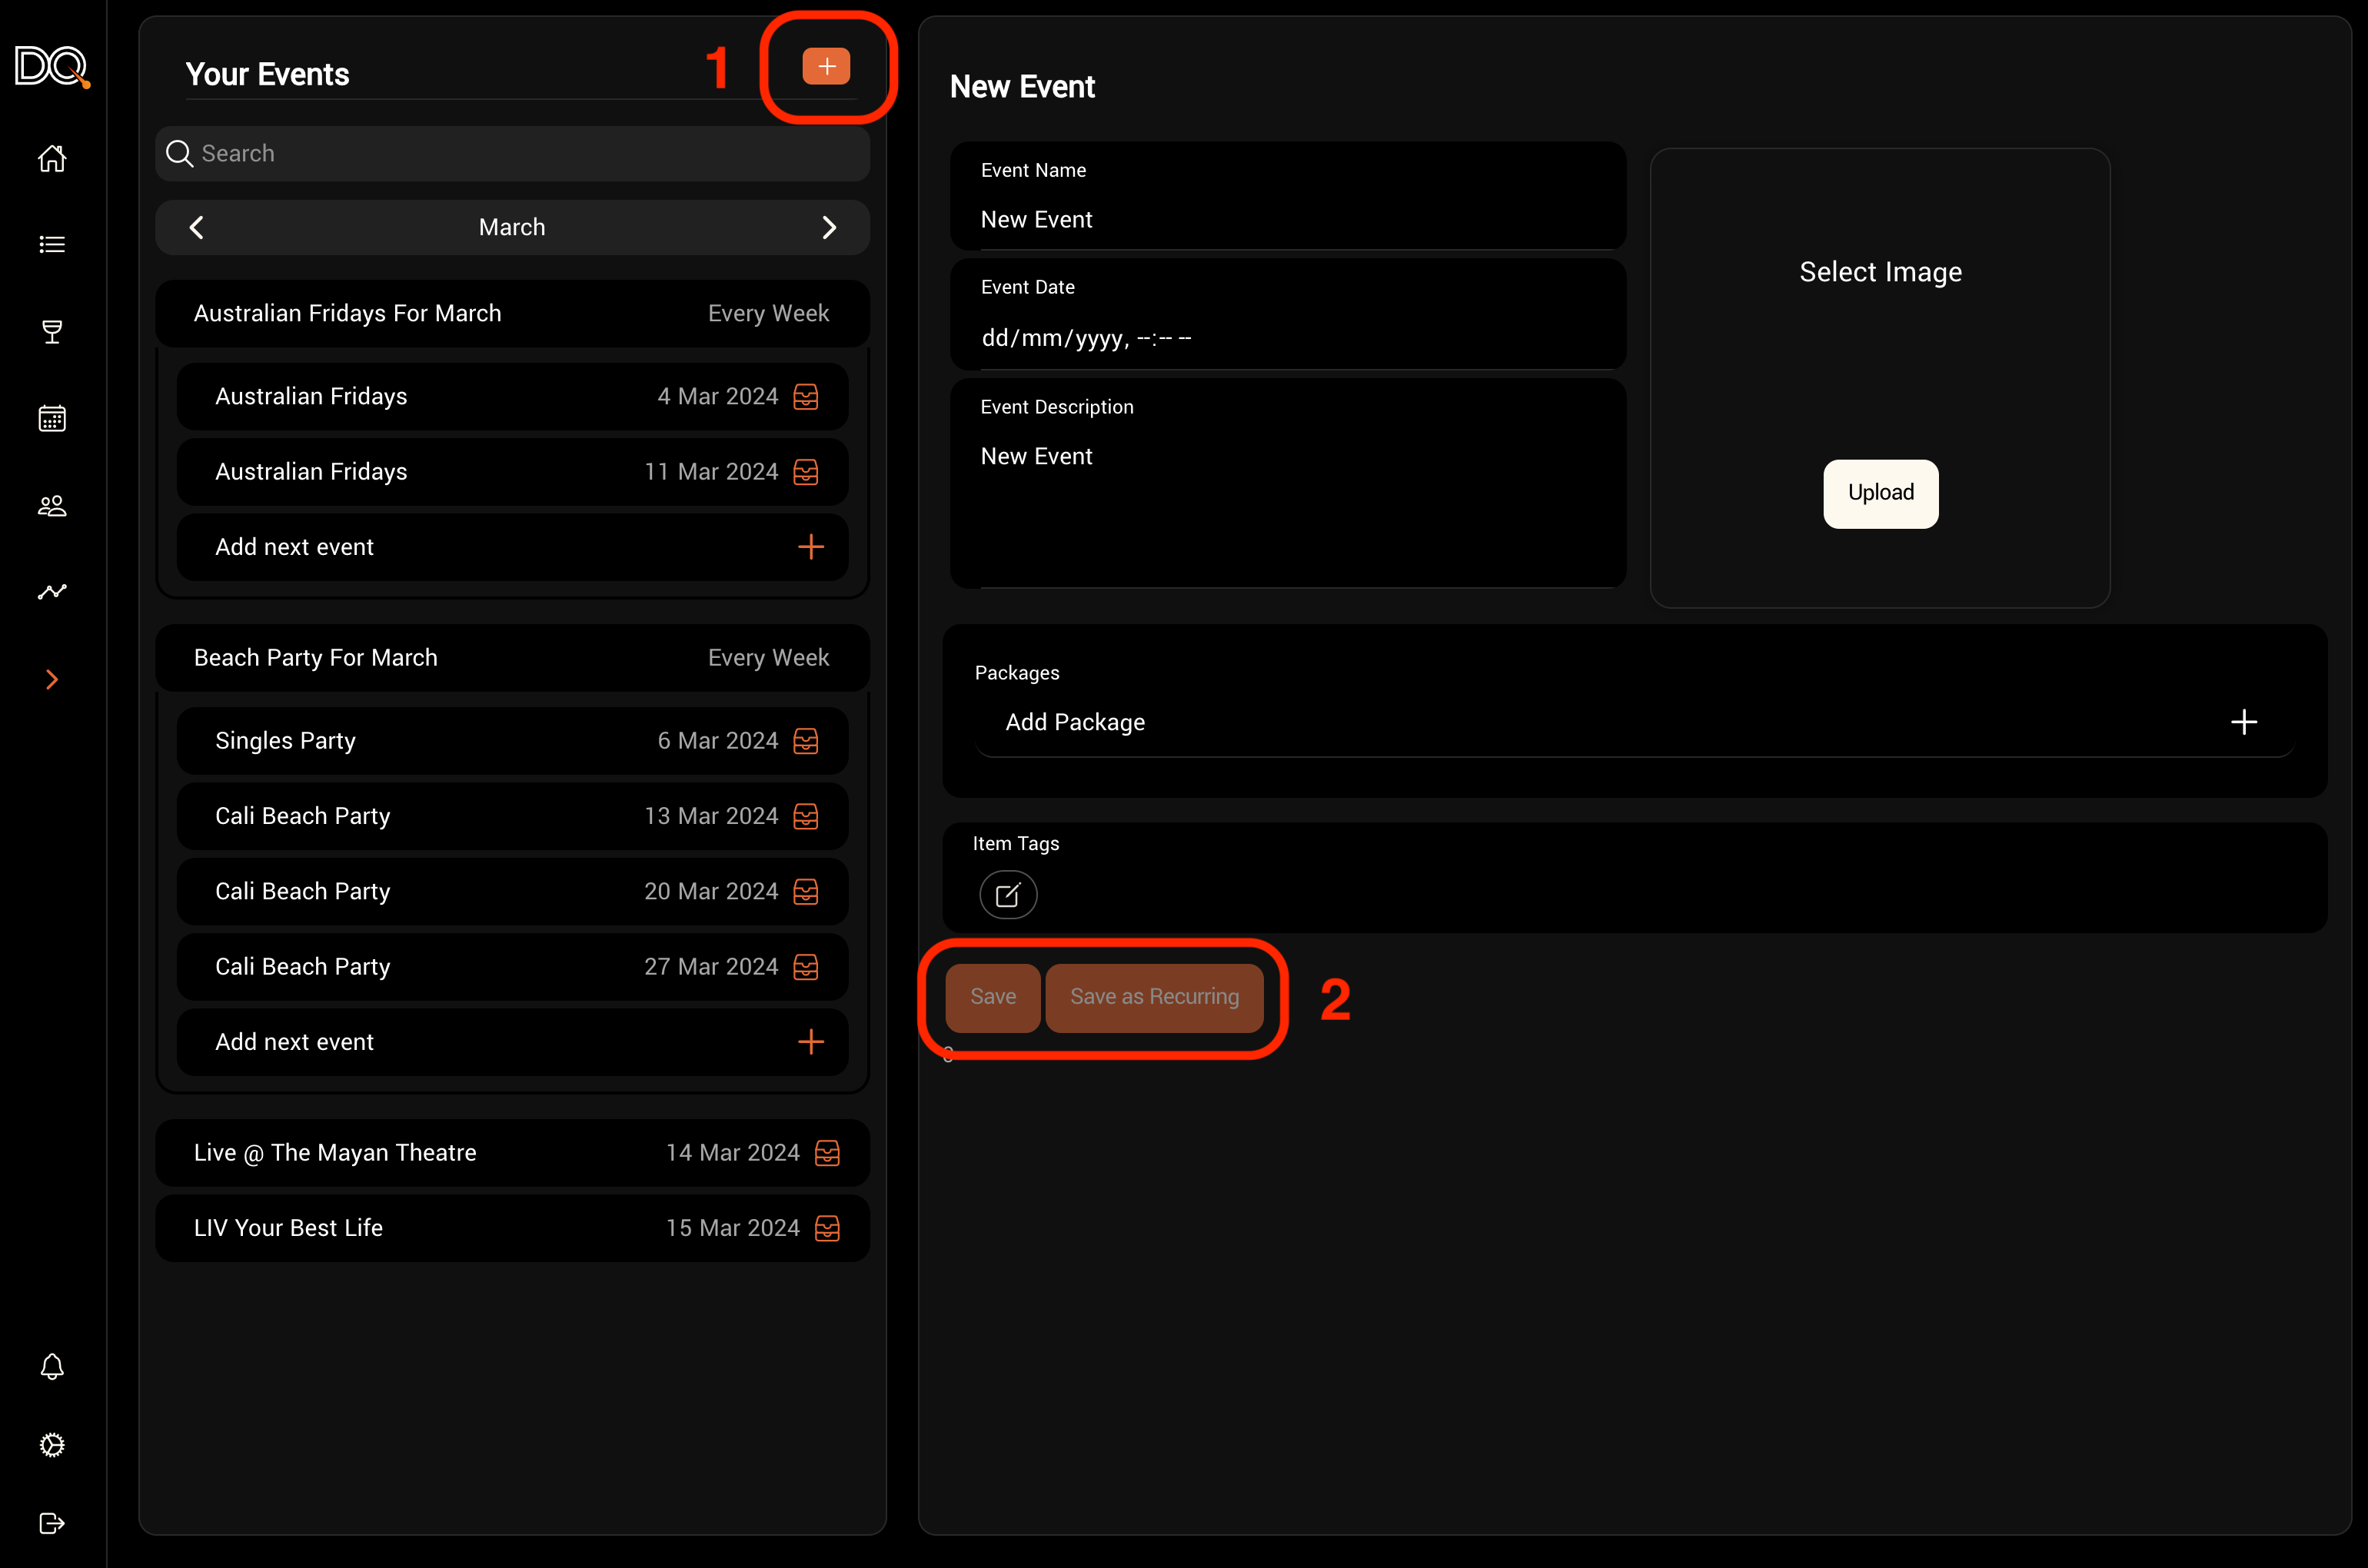
Event Properties
| Property | Description | Required |
|---|---|---|
| Name | Name of the event | Yes |
| Date | Date and time of the event | Yes |
| Description | A customer-facing description | No |
| Image | Used for customer-facing pages and digital wallet passes | No |
| Packages | Booking options available for this event | No |
| Tags | Metadata used to track and segment guests who attend | No |
After saving the event, you’ll have options to:
- Share a link to the event
- Duplicate the event
- Archive the event