> ## Documentation Index
> Fetch the complete documentation index at: https://help.getdqd.com/llms.txt
> Use this file to discover all available pages before exploring further.
# Creating Bookings
> Bookings are the core of every visit to your venue: allowing you to plan, track guest lists, monitor upsells, and more.
The **Bookings** page in DQ streamlines the process of managing bookings and guest interactions at your venue. Here’s a guide on how to use bookings effectively.
## Events Overview
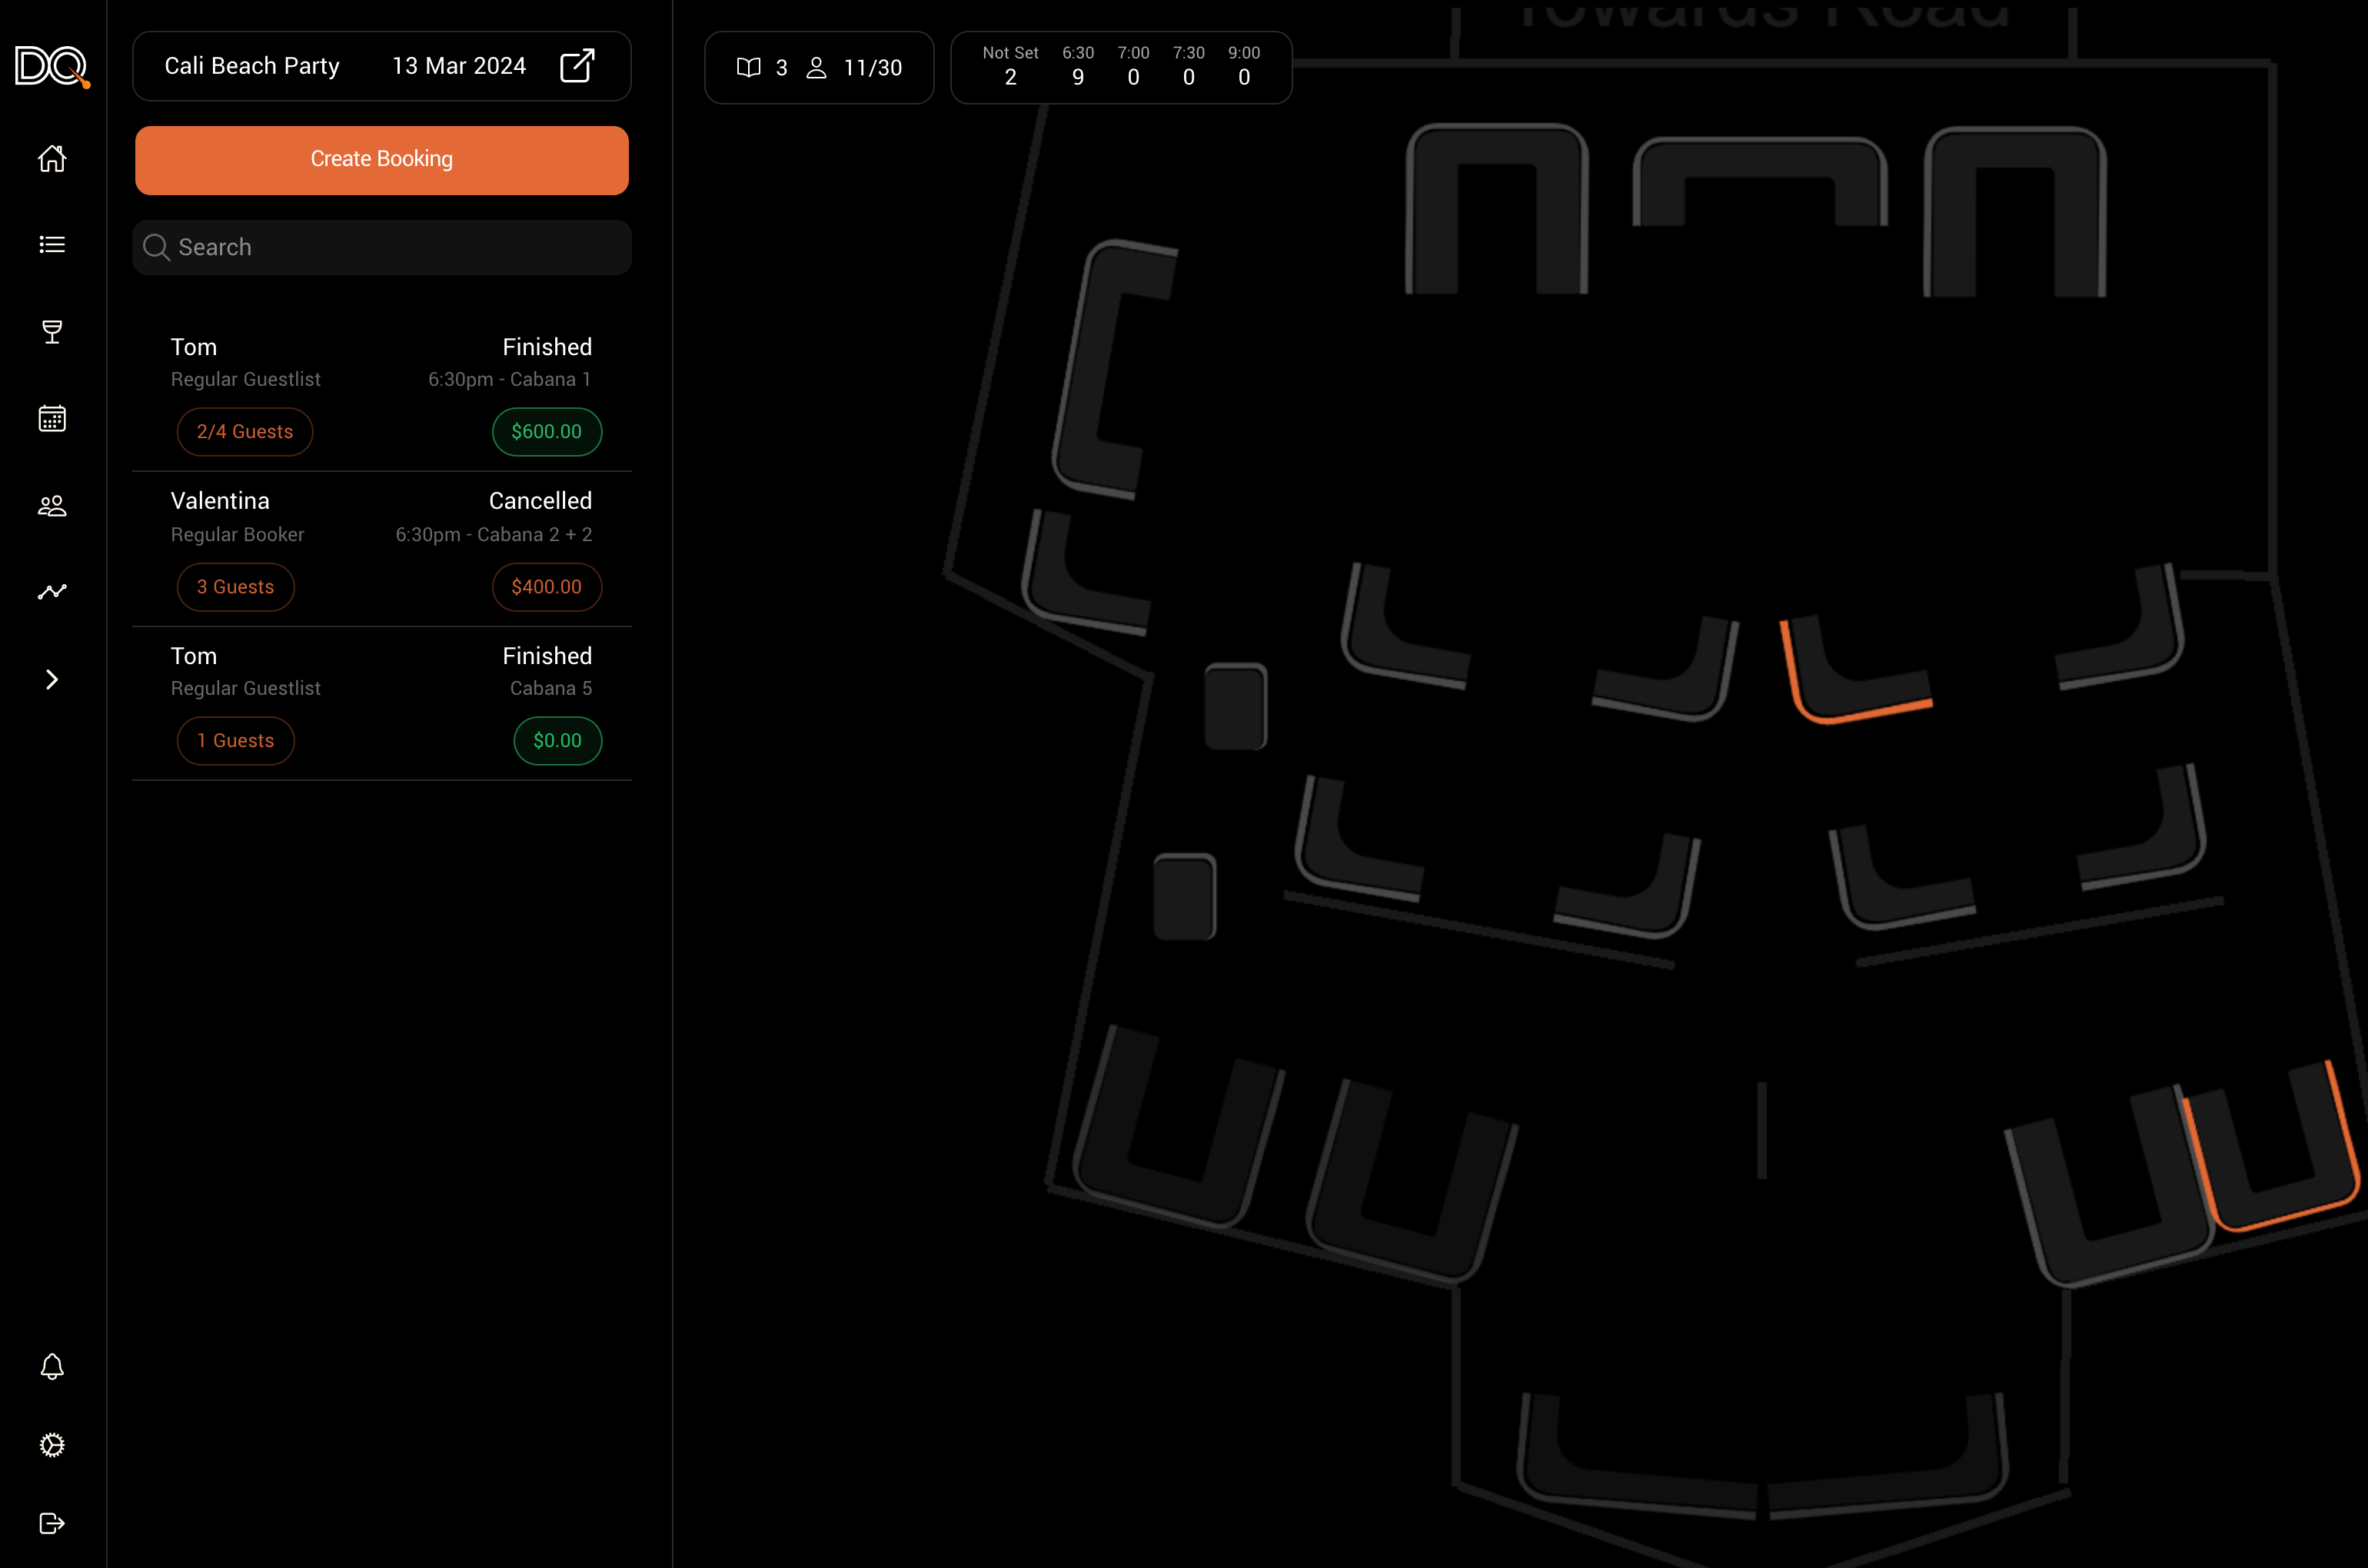
On the bookings management page, you’ll see your venue’s floor plan alongside a list of any pending bookings requiring attention.\
To view bookings for a specific event, select the event from the dropdown in the top-left corner.
After selecting an event, you will:
* See bookings for that event.
* View a color-coded floor plan:
* **Grey** tables are vacant.
* **Orange** tables have a booking.
Clicking on a table will show any bookings associated with it.
The calendar view above the floor plan shows booking distribution across time slots, helping you manage space and time efficiently.
 ## Creating Bookings
### Using the Desktop Site
To create a new booking:
1. Navigate to the **Bookings** page by selecting the calendar icon from the left-hand menu.
2. Click **"Create New Booking."**
3. Choose a **Package** — a templated booking option.
### Using the DQ Pro App
In the DQ Pro app:
1. Go to the **Bookings** tab (bottom-right).
2. Tap **"+"** to create a booking.
3. Select a **Package** or add **Included Items**.
| Property | Description | Required |
| --------------- | ---------------------------------- | -------- |
| Event | The event the booking is for | No |
| Booking Package | The template used for this booking | No |
| Guest | The primary booker | No |
| Table | The assigned table(s) | No |
If you have automatic communication enabled, an SMS or email will be sent to the guest with a link to view the booking and invite guests.
## Managing Booking Information
Clicking on a booking opens a side panel with detailed information.
You can:
* Edit the guest or table by clicking their names.
* View and manage booking status, payments, and guest details.
### There are three main tabs:
Displays booking payment info and included items.\
You can:
* Change the package.
* (Depending on permissions) Edit the cost and inclusions.
* Use **"Seat Guest"** to check the guest in and request included items.
Shows a detailed breakdown of payment activity.
* Swipe **left** on a receipt to issue a refund.
* Swipe **right** to send a digital receipt.
More details on managing payments are available [here](/operations/dispense/managing-payments).
Manage settings related to the guest and their relationship with the venue.
* **Booking Tags**: Use tags to highlight important info (e.g., VIP, birthday).
* **Promoter**: See who made the booking, or assign a staff/promoter.
* **Included Guests**: View the max number of guests allowed under the booking.
* **Arrival Time**: Set or view the expected arrival time.
* **Guest List**: Edit the guest list (guests or staff can do this).
* Lock the list by clicking the **lock** icon.
* Add guests with **"Add Guest."**
* Remove guests by swiping left.
* Once seated, check guests in using the checkbox next to their names.
## Other Booking Options
Handling guest arrival and guest lists.
Starting the night using DQ.
## Creating Bookings
### Using the Desktop Site
To create a new booking:
1. Navigate to the **Bookings** page by selecting the calendar icon from the left-hand menu.
2. Click **"Create New Booking."**
3. Choose a **Package** — a templated booking option.
### Using the DQ Pro App
In the DQ Pro app:
1. Go to the **Bookings** tab (bottom-right).
2. Tap **"+"** to create a booking.
3. Select a **Package** or add **Included Items**.
| Property | Description | Required |
| --------------- | ---------------------------------- | -------- |
| Event | The event the booking is for | No |
| Booking Package | The template used for this booking | No |
| Guest | The primary booker | No |
| Table | The assigned table(s) | No |
If you have automatic communication enabled, an SMS or email will be sent to the guest with a link to view the booking and invite guests.
## Managing Booking Information
Clicking on a booking opens a side panel with detailed information.
You can:
* Edit the guest or table by clicking their names.
* View and manage booking status, payments, and guest details.
### There are three main tabs:
Displays booking payment info and included items.\
You can:
* Change the package.
* (Depending on permissions) Edit the cost and inclusions.
* Use **"Seat Guest"** to check the guest in and request included items.
Shows a detailed breakdown of payment activity.
* Swipe **left** on a receipt to issue a refund.
* Swipe **right** to send a digital receipt.
More details on managing payments are available [here](/operations/dispense/managing-payments).
Manage settings related to the guest and their relationship with the venue.
* **Booking Tags**: Use tags to highlight important info (e.g., VIP, birthday).
* **Promoter**: See who made the booking, or assign a staff/promoter.
* **Included Guests**: View the max number of guests allowed under the booking.
* **Arrival Time**: Set or view the expected arrival time.
* **Guest List**: Edit the guest list (guests or staff can do this).
* Lock the list by clicking the **lock** icon.
* Add guests with **"Add Guest."**
* Remove guests by swiping left.
* Once seated, check guests in using the checkbox next to their names.
## Other Booking Options
Handling guest arrival and guest lists.
Starting the night using DQ.